We have had fun doing group costumes ever since our kids’ first Halloween. We started out off the rack with ducks and raccoons and then I began making their costumes with some elements that are store bought. The next two themes were inspired by nursery rhymes: Little Bo Peep Found Her Sheep followed by Hey Diddle Diddle, the Cat and the Fiddle. Then, we did The Very Hungry Caterpillar by Eric Carle inspired costumes. Last year, we did The Lorax by Dr. Seuss inspired costumes. This year, we went with The Lion, The Witch and the Wardrobe, Narnia (by C.S. Lewis) inspired costumes. I read our children the story one or two chapters at a time at bedtime a while ago and then they saw the movie. They enjoy the characters and were excited about the theme.
Since I spend a lot of time each year making costumes, I find it worthwhile to hire a professional photographer to capture it. Each year, we have been lucky to have Mia of Mia Z Photography do the photo shoot for us. She has twins, is mellow and great with kids and is a talented photographer too! All photos in this post are done by Mia.
*This post contains affiliate links. For more information read my full disclosure here.
Here is a group shot of the Narnia inspired costumes.

Mr. Tumnus, King Peter, Aslan and The White Witch of Narnia Inspired Costumes
Grayson is dressed as Aslan the lion. I used the most store bought elements in his costume. I bought a lion costume on Ebay that was too small (but the only one available). I was unimpressed with the tiny lion head that came with it, so I used it underneath for volume only (not pictured). When I was looking up lion costumes, the one with the most volume was this dog costume! It worked perfectly over the other lion head (and would also work alone). He wore a wig cap to cover his hair. He also wore an invisible man suit underneath to cover where his costume did not. I bought this animal make-up kit and these non-toxic face paint crayons to do his lion face.

Ryder was dressed as King Peter of Narnia. The cape and the top part of his costume (blue and gold) were entirely homemade with no pattern. I could not find a pattern for this after an extensive search so I made my own. He wore the store bought shirt underneath (which he already had and resembles the one in the movie) and store bought pants. The shoe covers were made by cutting off the bottom of a too small knight costume I found at a local thrift shop. The color just happened to match perfectly. The crown was store bought at a local dance supply store. I removed the plastic gems that were on it as King Peter does not have gems. It was windy the day of the photo shoot which helped lift his cape into the air.

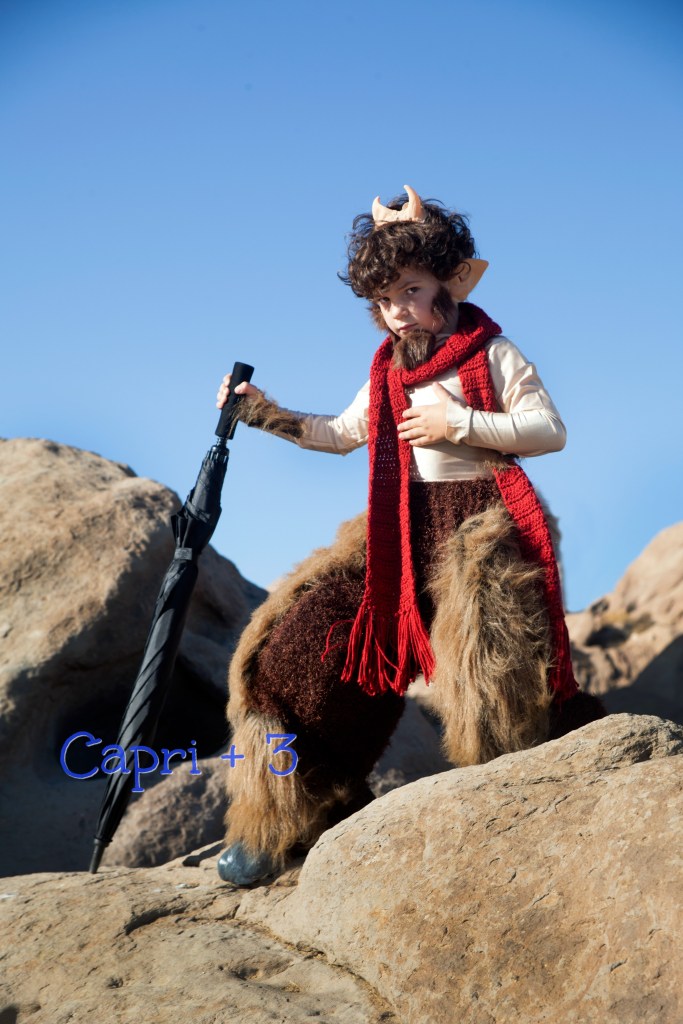
I am thinking of doing a tutorial post for the next costume inspired by Mr. Tumnus of Narnia. I looked all over for a tutorial for a child’s costume and could find none. I had to wing it! But, I was happy with the results. Xayden gave me the biggest hug and said he loved his costume more than any he has ever had. That made it all worth it! You can see in the first picture that he has forearm hair and in the second picture, he has back hair too (like Mr. Tumnus does in the film). I made the hooves from scratch and used a mixture of store bought (majorly modified by me) elements to create this look. Greg added the padding to the legs to create the shape of faun legs. Xayden just happens to have the perfect length of curly hair, so no wig was required. The facial hair did not do well in the wind and you can see that he is missing his goatee in the top group photo. For Halloween, we used spirit gum to keep it on which worked well.

Lastly, Capri dressed up as the White Witch of Narnia. There are no store bought versions of this out there either, so I created it from store bought and modified store bought elements. The dress was purchased new with tags from an online auction for a small fraction of the cost and is an adult small. I pinned it in the top back side and made it off the shoulder which was easy to do as it was too big! The cape was also new with tags from an online auction and also very inexpensive. I used this princess wig and spent a long time modifying it by twisting strands of hair, two bunches at a time and hot gluing the bottom of each one before twisting it up to a side-back bun. The icicle head piece is made from a Christmas ornament which I modified by cutting off the piece used to hang it up. Then I made a glued together craft stick support for it and hot glued it to that. Then, I hot glued it to the styled wig and used clear hair bands also to help it stay on. She wore a wig cap underneath (the same kind used for Aslan the lion). The wig was heavy and it took some major bobby pins to get it to stay on. The side back bun turned into more of a side bun against my will. Mia, our photographer, gave me the tip to pin the wig cap on first, then pin the wig right through it. That made a big difference for Halloween (after it fell a lot during the photo shoot!) I am happy everything came together in the end.

You guys rocked it again!
Thank you Michele. It was a fun theme. : 0 )